Thursday, 26 July 2012

Install Google Ears on Android ICS Device


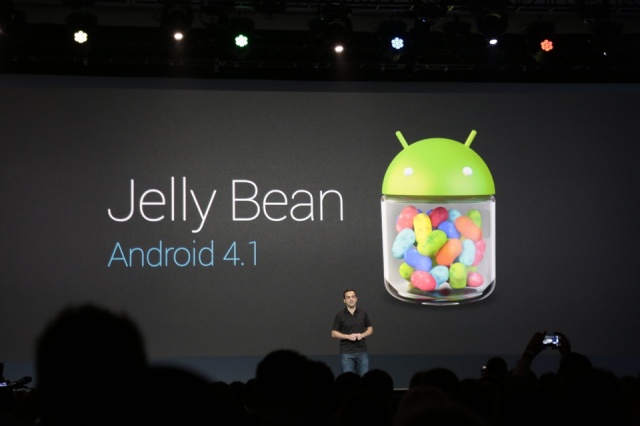
With the launch of the Android’s latest iteration, Jelly Bean, a bunch of new apps were revealed in the function which was held in USA about a week ago. One of the app which seemed to be interesting to users was Google Ears. As the name implies, the app listens to the sound playing around it and tells you more info about that track. If you’ve used Shazam app, this app works in the same way. If you have an Android ICS device and want to test out this app, you can follow the procedure given below. It explains all the steps involved in installing the Google Ears app on your device. Here you go:


I. Before You Begin:

1. You must be running on Android ICS or Jelly Bean.


II. Downloading Required Files:

1. Download the Google Ears App from here. (Link is there in the first post, titled as No Root Devices)

2. Download the Astro File Manager App from here. (Google Play Link)


III. Installing Google Ears App on your ICS Device:

1. Download and install the Astro File Manager app on your smartphone.

2. Connect your phone to your PC using the USB cable.

3. Transfer the Google Ears APK file to your phone’s SD card folder.

4. Disconnect your phone from the PC after the file has successfully been transferred to your phone.

5. Go to Menu>>Settings>>Applications and enable Unknown sources.

6. Open the Astro FIle Manager App on your phone and tap the Google Ears APK file to install it.

7. After the installation process has finished, reboot your smartphone.


There you go ! You have successfully installed the Google Ears App on your smartphone. Now, you can add the Ears widget on your homescreens as you would normally add other widgets.


Sunday, 22 July 2012

Install All the Jelly Bean Apps on your Android Device


Android’s latest version Jelly Bean has pleased all the Android Fans by bringing some great new apps that were not present in the previous versions of Android. The apps have been extracted from the Jelly Bean ROM and they are now available to be flashed on any Android device running on the Ice Cream Sandwich. If you are running ICS on your smartphone, then head on to the following procedure to see how you can get almost all the Jelly Bean Apps on your device.


I. Before You Begin:

1. You must have rooted your device before doing this procedure.

2. You must have ClockworkMod Recovery installed on your device.

II. Downloading Required Files:

1. Download the CWM Flashable JB Apps from here. (Download link is in the second post)

2. Download the list of included Apps in the file from here. (Optional)


III. Installing Jelly Bean Apps on your Android Device:

1. Download and place the CWM Flashable JB Apps file onto your Desktop.

2. Connect your device to your PC using the USB cable that came with it.

3. Transfer the JB Apps file to the root folder of your device’s SD card.

4. After you have successfully transferred the file, disconnect your device from the PC.

5. Turn OFF your device using the Power button.

6. Reboot your device into the ClockworkMod Recovery. You need to find the key combination to enter ClockworkMod Recovery from the ClockworkMod Installation procedure for your device.

7. Once you are in the recovery mode, choose install zip from sdcard followed by choose zip from sdcard.

8. Navigate to the JB Apps File which you transferred to your device earlier and select it for flashing using the Power button.

9. It will take a while to install all the Apps. Once it’s done, choose reboot system now from the recovery menu.


Your device will reboot and when it boots up, you will see all the Jelly Bean Apps right in the Menu of your phone. Check out all the apps in there and let us know how they are.

Access Certain Google Play Services from Outside the USA


As you probably know that Google provides various services to its Android Phone users over at Google Play Store. Some of these services are available in select countries only, e.g., USA and are not available in other countries. To provide the users a way to access such services from outside the USA, an XDA Forum member has come up with a solution. Following guide shows his way to access these services from outside the USA.


I. Before You Begin:

1. You must have rooted your smartphone before doing this procedure.

II. Downloading Required Files:

1. Download the Google Play Store from here. (Download link is given in the first post)

2. Download the Market Enabler App from here.

3. Download the DroidVPN App from here. (Google Play Link)


III. Applying the Trick on your Smartphone:

1. Download and install the aforementioned apps on your smartphone.

2. After installing the apps listed above, open the DroidVPN app from your phone’s Menu.

3. From inside the app, register for an account. You need to choose an Username and Password for your account.

4. After the registration process is completed, exit the app on your phone.

5. Navigate to Menu>>Settings>>Applications>>Manage applications and tap on the Google Play Store.

6. Tap the Clear data and Clear cache buttons on the page that follows.

7. Go to the Menu of your phone and launch the Market Enabler app by tapping its icon.

8. From the list of network providers, choose any US provider, T-Mobile, for example, tap on it and choose fake this provider now.

9. Open the DroidVPN app once again and login with your username and password.

10. Hit the Start button in the app to begin using your VPN account.

11. Open up the Google Play Store app on your smartphone and you can now access the services which weren’t available for you due to the country-restriction.


You now have access to various services, like Google Music, Google Books from your smartphone even though you are not a resident of USA.

Thursday, 19 July 2012

Install Android Jelly Bean Font on Android Device


If you are running Android Ice Cream Sandwich on your smartphone, then you are lucky as you can now install the Jelly Bean Font on your device to make it look like you are really running the JB. The font is similar to Roboto, which was announced with ICS, but it looks a bit slimmer. Well, not wasting time, let’s get to the procedure on how you can install Jelly Bean Font on your Android device right now.

I. Before You Begin:

1. You must be running on Android Ice Cream Sandwich.

2. You must have rooted your smartphone before doing this procedure.

3. You must have installed ClockworkMod Recovery on your smartphone.

II. Downloading Required Files:

1. Download the Jelly Bean Font from here. (Download link is in the first post)

2. Download the Stock Font from here. (Download link is in the first post)

III. Installing Jelly Bean Font on your Android Smartphone:

1. Download and place both the font files onto your Desktop.

2. Connect your phone to your PC using the USB cable.

3. Transfer both the font files to the root folder of your SD card.

4. Disconnect your phone from the PC after you have transferred the files.

5. Turn OFF your smartphone using the Power key.

6. Reboot your phone into the ClockworkMod Recovery. The key combination to get into the recovery varies device-by-device. You should check out the CWM procedure for your smartphone to know these keys.

7. Once you are in the recovery, choose install zip from sdcard followed by choose zip from sdcard.

8. Locate the Jelly Bean Font file on your SD card and select it for flashing.

9. Let the flashing complete. Once it’s done, choose reboot system now from the recovery menu.


There you go. You have successfully installed the Jelly Bean Font on your Android smartphone. When your phone boots up, you will see these newly installed fonts instead of old ones. For any reason, if you want to get back the old font, simply follow the steps given below.

IV. Installing Stock ICS Font on your Android Smartphone:

1. Turn OFF your smartphone using the Power key.

2. Reboot into the Recovery Mode by using the key combination which you got from the CWM installation procedure for your phone.

3. From inside the recovery, choose install zip from sdcard followed by choose zip from sdcard.

4. Navigate to the Stock ICS font file you transferred to your phone and select it for flashing.

5. After the flashing process has finished, choose reboot system now from the recovery menu.


You should now see the stock ICS font on your smartphone and the Jelly Bean font is gone. Well, it depends on the choice of yours, whether you like ICS or JB.